 Save Pin
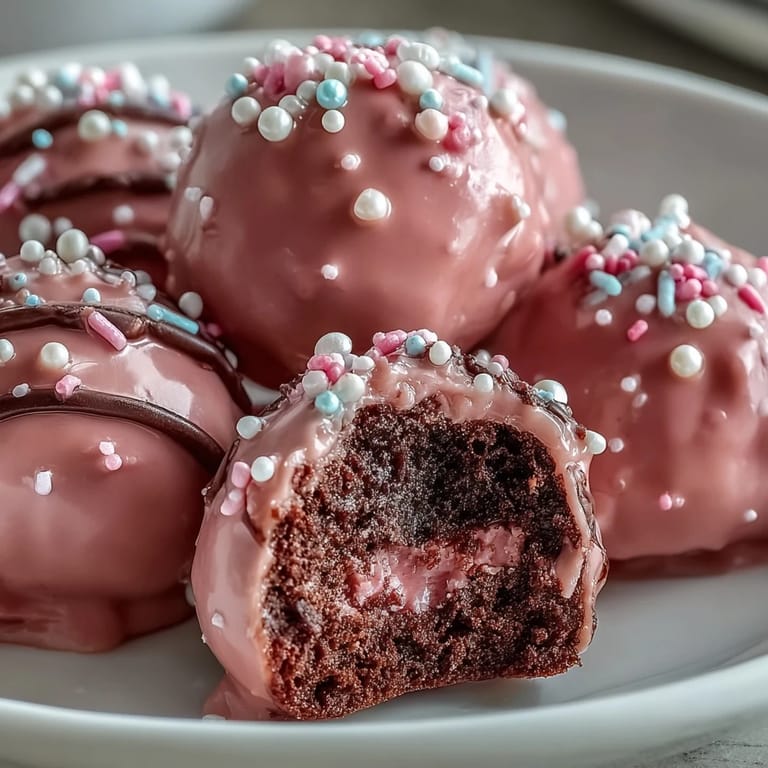
 My cousin showed up to a bridal shower with a platter of these bright pink orbs that looked almost too perfect to eat. She swore they took less than an hour, and I didn't believe her until I tried making them myself that weekend. The first batch disappeared before dinner, my kids fighting over the last two like they were treasure. I've been making them ever since for birthdays, bake sales, and random Tuesdays when we need something sweet. They've become my go-to trick when I want to look like I spent all day in the kitchen.
I made these for my daughter's dance recital last spring, and the other moms kept asking if I ordered them from a bakery. One even took a photo to show her husband as proof that homemade desserts could look store-bought. I didn't admit how easy they were until someone offered to pay me to make a batch. Now I bring them to every potluck, and people have stopped asking for the recipe because they assume it's complicated.
Ingredients
- Oreo cookies: Use the whole cookie, filling and all, for that signature cookies-and-cream flavor that needs no additions.
- Cream cheese: Let it sit on the counter for at least 30 minutes so it blends smoothly without lumps or streaks.
- Pink candy melts: These set firmer than chocolate and give you that glossy, professional-looking shell without tempering.
- Vegetable shortening: A tiny bit thins the melted candy just enough to coat evenly without clumping or cracking.
- Sprinkles or edible pearls: Optional, but they add a playful touch that makes these feel like a celebration.
Tired of Takeout? 🥡
Get 10 meals you can make faster than delivery arrives. Seriously.
One email. No spam. Unsubscribe anytime.
Instructions
- Crush the cookies:
- Pulse the Oreos in a food processor until they turn into fine, dark crumbs, or seal them in a zip-top bag and roll over them with a pin until no big chunks remain. You want a texture like wet sand, uniform and easy to pack.
- Mix the base:
- Stir the softened cream cheese into the crumbs with a sturdy spatula, folding and pressing until the mixture turns smooth and holds together when squeezed. It should look like dark cookie dough with no white streaks.
- Shape the truffles:
- Scoop tablespoon-sized portions and roll them firmly between your palms to form smooth, round balls. Line them up on a parchment-covered baking sheet as you go.
- Chill them down:
- Pop the tray in the fridge for 30 minutes or the freezer for 15, just until the truffles feel firm and cold to the touch. This step keeps them from falling apart when you dip them.
- Melt the candy coating:
- Microwave the pink candy melts in 30-second bursts at medium power, stirring between each round until silky and smooth. Stir in the shortening if you want a thinner, glossier coating.
- Dip and coat:
- Use a fork to lower each chilled truffle into the melted candy, then lift it out and tap the fork gently on the bowl's edge to shake off the excess. Set it back on the parchment-lined sheet.
- Decorate while wet:
- Sprinkle on decorations immediately, before the coating hardens. Work quickly, or the candy will set and the toppings won't stick.
- Let them set:
- Leave the truffles at room temperature until the coating feels hard to the touch, or speed it up by chilling them in the fridge for 10 to 15 minutes. Once set, they're ready to serve or store.
 Save Pin
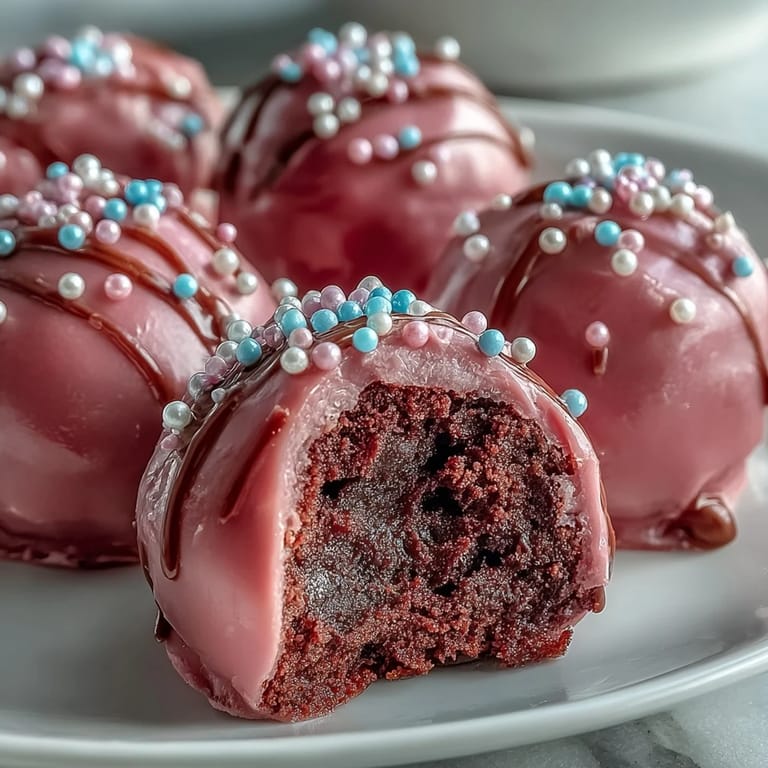
 The first time I brought these to a friend's baby shower, a guest asked if I used a secret family recipe. I laughed and told her it was just Oreos and cream cheese, and she didn't believe me until I walked her through it the next week. Now she makes them for her book club and texts me photos every time. It's funny how something so simple can feel like a gift you keep passing on.
Choosing Your Candy Coating
Candy melts come in almost every color and set faster than regular chocolate, which is why I reach for them when I need clean, bold results. You can swap pink for pastel blue, bright red, or even metallic gold depending on the occasion. If you prefer real chocolate, use tempered chocolate instead, but know it takes more patience and a candy thermometer. I've also tinted white candy melts with oil-based food coloring to match party themes, and it works beautifully as long as you avoid water-based dyes that cause seizing.
Texture Tips and Variations
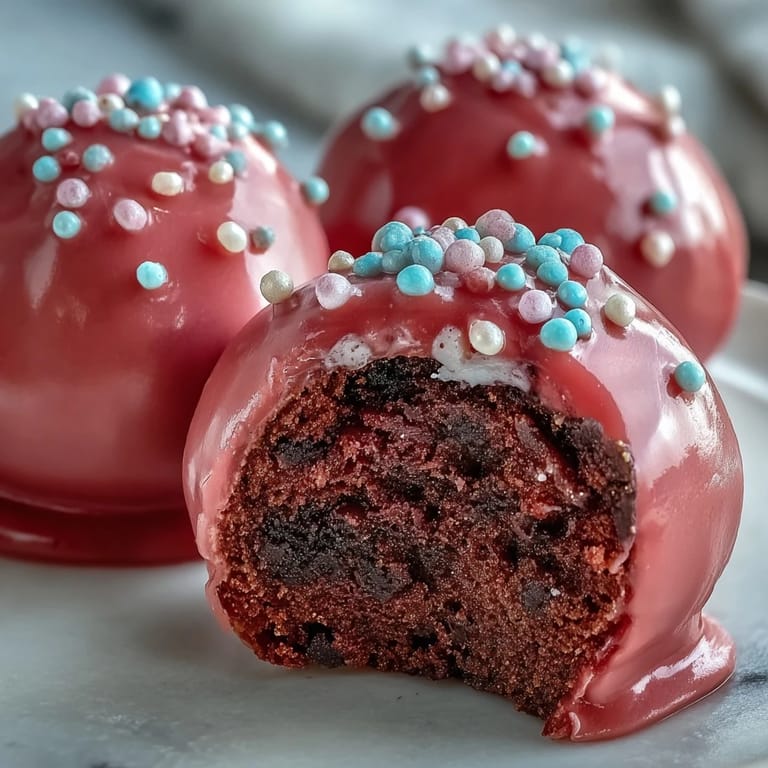
If you want a little crunch, fold in finely chopped pecans or toasted coconut flakes after mixing the cream cheese and crumbs. I've also added a tablespoon of peanut butter to the base for a subtle nutty flavor that pairs surprisingly well with the Oreos. For a richer truffle, swap regular Oreos for double-stuffed, but use slightly less cream cheese or the mixture will be too soft to roll. Some people like to freeze the truffles for an hour before dipping to make the coating extra thick, which works if you prefer a heavier candy shell.
Storing and Serving
These truffles taste best when served cold, straight from the fridge, so the coating stays firm and the center feels creamy and dense. I keep them in an airtight container layered between sheets of parchment paper so they don't stick together. They'll hold up for a full week in the fridge, and I've even frozen a batch for three weeks without any loss in texture or flavor. Just let them thaw in the fridge for a few hours before serving, and they'll taste freshly made.
- Layer them in a pretty tin with parchment between each row for gifting.
- Set them out 10 minutes before guests arrive so the coating softens just slightly.
- Pair them with coffee or champagne for an easy dessert that feels indulgent.
 Save Pin
 These little pink spheres have become my secret weapon for looking like I have my life together, even when I absolutely don't. Make them once, and you'll understand why people keep asking you to bring them again.
Recipe FAQs
- → How long should I chill the truffle balls before dipping?
Chill the rolled truffle balls in the refrigerator for 30 minutes or freezer for 15 minutes until firm enough to handle without losing their shape. Proper chilling prevents the balls from falling apart during the dipping process.
- → Can I use white chocolate instead of candy melts?
White chocolate can be used, but candy melts are specifically formulated for coating and will set up harder with a better snap. If using white chocolate, temper it properly and consider adding a teaspoon of vegetable shortening to achieve a smooth, dippable consistency.
- → How do I prevent air bubbles in the candy coating?
Tap your dipping fork gently against the side of the bowl after dipping each truffle to remove excess coating and release any trapped air bubbles. Work in smooth, confident motions rather than hesitating, which can cause uneven coating.
- → Can I make these truffles ahead of time?
Absolutely. These truffles store beautifully in an airtight container in the refrigerator for up to one week. They can also be frozen for longer storage—just thaw them in the refrigerator overnight before serving. The coating may develop condensation when thawing, so let them sit at room temperature for 15 minutes before serving.
- → What's the best way to crush the Oreos?
A food processor creates the finest, most uniform crumbs in just seconds. If you don't have one, place the cookies in a sealed zip-top bag and crush them with a rolling pin or heavy bottom of a pan. For the smoothest texture, process until no large chunks remain.
- → Why add vegetable shortening to the candy melts?
Vegetable shortening thins the melted candy coating, making it easier to dip and creating a smoother, shinier finish. It also helps the coating set up with a better snap. Use only 1 teaspoon per 12 ounces of candy melts—a little goes a long way.