Save Pin
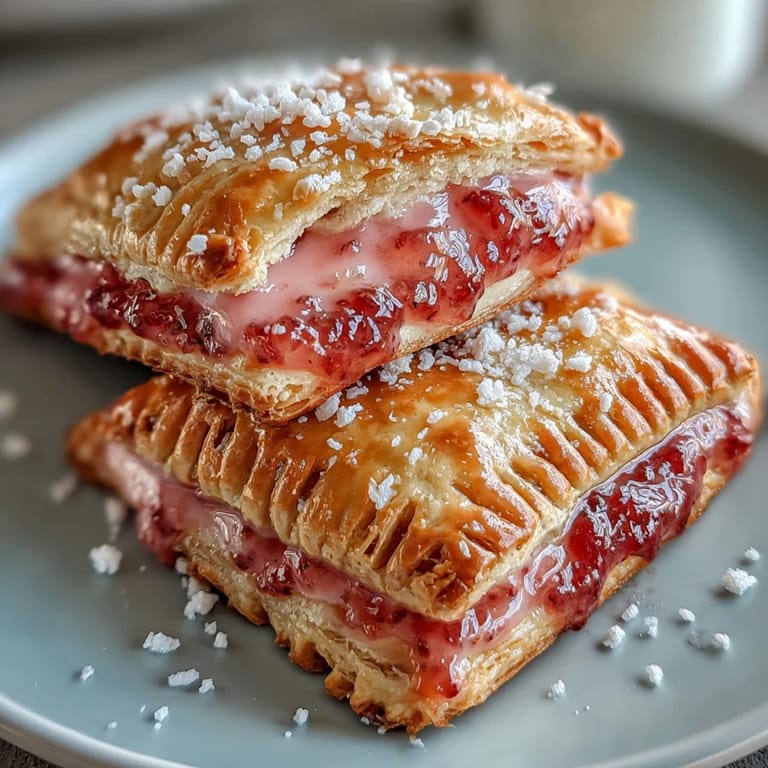
 There's something magical about biting into a homemade pop tart that still has warmth in the pastry and a filling that actually tastes like fruit, not artificial syrup. I discovered guava and cream cheese together while experimenting one weekend when the farmers market had the most beautiful pink guava paste I'd ever seen, and I thought, why not take this childhood breakfast staple and make it grown-up? The combination of flaky, buttery pastry with that sweet-tart guava and silky cheese filling transformed a simple morning snack into something worth waking up for.
I made these for a small breakfast gathering on a Sunday, and watching people's faces when they realized the filling was real fruit and cheese—not that sweet goo from their childhood—was worth every minute of preparation. One friend asked for the recipe immediately, then confessed she'd been buying the boxed version for years and felt a little betrayed by how much better homemade could be.
Ingredients
- All-purpose flour (2 1/4 cups): This is your pastry foundation, and the amount matters because too much will make the dough tough and dense instead of delicate.
- Unsalted butter, cold and cubed (1 cup): This is the star of flakiness—it needs to stay cold so it creates steam pockets in the oven that give you those gorgeous layers.
- Ice-cold water (1/3 cup): Temperature matters here; I use water that's been sitting with ice cubes, and I add it gradually because flour absorbs water differently depending on humidity.
- Guava paste or thick guava jam (3/4 cup): Look for paste that's thick enough it won't leak through the pastry, or your edges will seal but the filling will escape during baking.
- Cream cheese, softened (4 oz): Room temperature cream cheese blends smoothly without lumps, which means you get a silky filling instead of chunky.
- Powdered sugar (1/3 cup total): Use it in both the filling and glaze to keep everything smooth and glossy.
- Egg for egg wash: This creates that beautiful golden-brown top and helps seal the edges so your filling stays inside where it belongs.
Tired of Takeout? 🥡
Get 10 meals you can make faster than delivery arrives. Seriously.
One email. No spam. Unsubscribe anytime.
Instructions
- Make the dough foundation:
- Whisk flour, sugar, and salt together, then add your cold butter cubes and work them in with a pastry blender or your fingertips until the mixture looks like coarse breadcrumbs. This step is where you decide if your pastry will be flaky or dense, so don't rush it or overmix.
- Bring the dough together:
- Add ice water a little at a time, stirring just until the dough holds together without being sticky. Divide it in half, flatten each into a disk, wrap in plastic, and let it chill for 30 minutes—this resting period lets the gluten relax and makes rolling easier.
- Prepare the cream cheese filling:
- Mix softened cream cheese with powdered sugar and vanilla until completely smooth and there are no lumps hiding in there. If the mixture feels stiff, you can add a tiny splash of milk to loosen it.
- Roll and cut your pastry:
- On a lightly floured surface, roll one dough disk to about 1/8-inch thick, then cut it into 8 rectangles roughly 3 by 4 inches. The thinner you can get it while keeping it intact, the crispier your tarts will be.
- Fill and seal the tarts:
- Place about a teaspoon each of guava paste and cream cheese mixture in the center of 4 rectangles, leaving a border so the edges can seal properly. Brush the borders with beaten egg, place a second rectangle on top, then press the edges down and crimp with a fork to make sure nothing escapes during baking.
- Chill before baking:
- Transfer your filled tarts to a parchment-lined baking sheet and refrigerate for 10 minutes so the pastry sets and bakes up tall instead of spreading flat. This is a small step that makes a real difference.
- Bake until golden:
- Brush the tops with egg wash, prick with a fork to let steam escape, and bake at 375°F for 22 to 25 minutes until the pastry is golden brown and feels firm to the touch. Let them cool completely on the baking sheet before you even think about glazing, or the glaze will melt right off.
- Make and finish with glaze:
- Mix powdered sugar, milk, and vanilla until you have a smooth, pourable consistency, then add food coloring if you want it pink or red. Drizzle or spread the glaze over the cooled tarts and let it set for a few minutes before serving.
 Save Pin
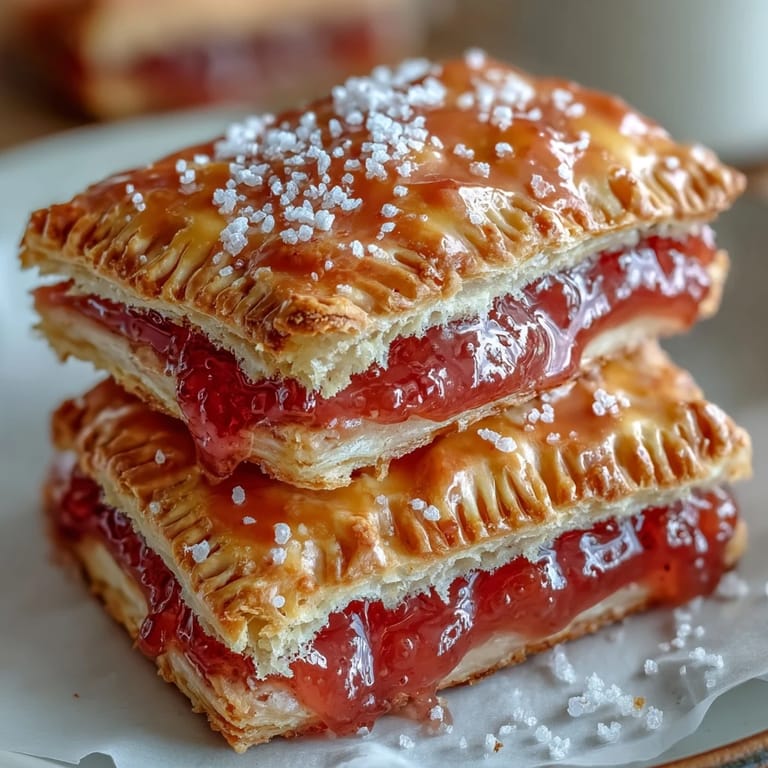
 These pop tarts have become my go-to gift for people who claim they're not morning people, because something about a homemade pastry with real fruit filling seems to change how they feel about breakfast. There's a kindness baked into food you make with your own hands that store-bought versions just can't replicate.
Why Homemade Pastry Changes Everything
The moment I started making my own pastry, I stopped being impressed by commercial versions that look perfect but taste waxy and fake. When you control the butter, the water, and the handling, you end up with something that actually shatters when you bite it and tastes like butter and flour and nothing else.
The Guava and Cheese Combination That Works
Guava is naturally sweet with a subtle tartness that can taste one-dimensional on its own, but cream cheese softens that sharpness and adds this rich, silky backdrop that makes the guava shine. I learned this by accident when I was pairing flavors for a different dessert, and now I can't imagine this filling without both components working together.
Making These Your Own
Once you understand how this recipe works, you have a template for any fruit and flavor combination you want to try, whether that's strawberry and mascarpone, apricot and almond, or even something savory if you're feeling adventurous. The beauty of a homemade pop tart is that it belongs to you the moment you make it.
- Sprinkle coarse sugar over the top before baking if you want extra crunch and sparkle.
- Store them in an airtight container for up to three days, or freeze the unbaked tarts and bake them fresh whenever you want.
- Try substituting the glaze with a simple dusting of cinnamon sugar for a different mood entirely.
 Save Pin
 These guava cheese pop tarts are proof that the best breakfast is one you make yourself, filled with flavors that feel both nostalgic and completely new. Make a batch on a weekend morning and you'll understand why homemade will always beat store-bought.
Recipe FAQs
- → Can I use fresh guava instead of guava paste?
Guava paste works best because it's concentrated and thick, preventing leakage during baking. Fresh guava would release too much liquid and make the pastry soggy. If unavailable, try thick strawberry or apricot jam as alternatives.
- → How do I prevent the filling from leaking?
Ensure you leave a clean border when placing the filling, seal edges thoroughly with egg wash, and crimp tightly with a fork. Chilling the assembled pastries for 10 minutes before baking also helps firm the dough and seal the edges.
- → Can I make these ahead of time?
Yes! Prepare the dough and filling separately up to 2 days in advance. Store the dough disks wrapped in plastic in the refrigerator. You can also freeze unbaked assembled pastries—bake from frozen, adding a few extra minutes.
- → What's the best way to reheat these?
For the crispest texture, reheat in a 350°F oven for 5-7 minutes. The microwave is faster but will soften the crust. If frozen, let thaw overnight in the refrigerator before reheating.
- → Can I freeze the baked pastries?
Absolutely! Once completely cooled (add glaze after freezing), wrap individually in plastic and freeze for up to 2 months. Thaw at room temperature, then add the glaze just before serving for best results.
- → Why is my dough tough instead of flaky?
Overworking the dough develops gluten, making it tough. Mix just until combined, and keep everything cold. If the butter warms up while working, chill the dough again before rolling. Handle the dough as little as possible.